User's Guide
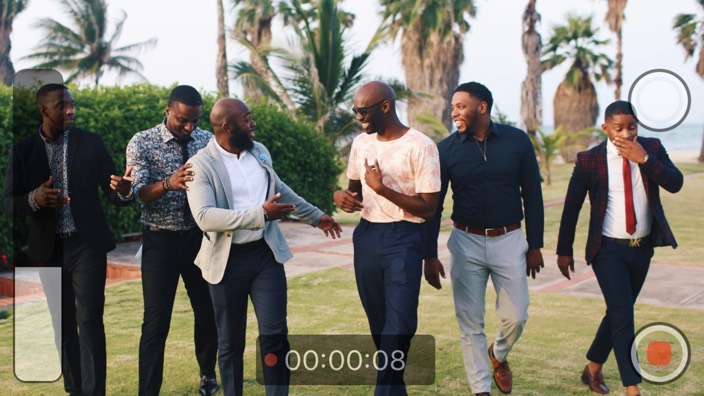
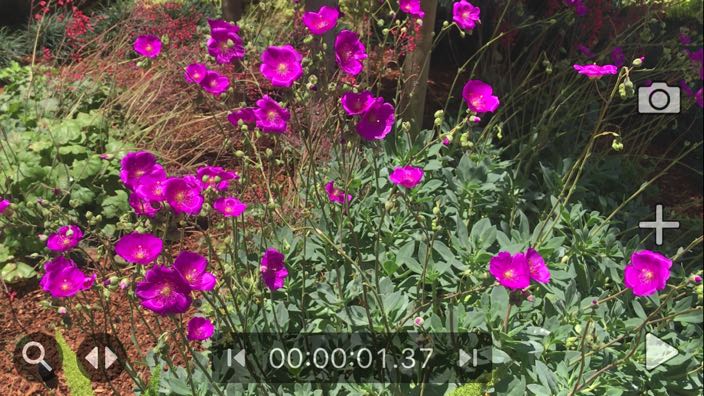
Camera Viewfinder
Buttery is designed to make it easy to record a video or take a photo - without a bunch of complex controls or tiny text.
The white button takes a photo, and the red button starts and stops video recording. You can do either at any time.
When recording, the elapsed time is shown.
When the "Zoom" Setting is enabled, a slider on the left adjusts the camera zoom. When not recording, it moves quickly. But during recording, it moves smoothly so the resulting video is easier to watch, and looks more professional.
The "+" plus button opens viewfinder options.
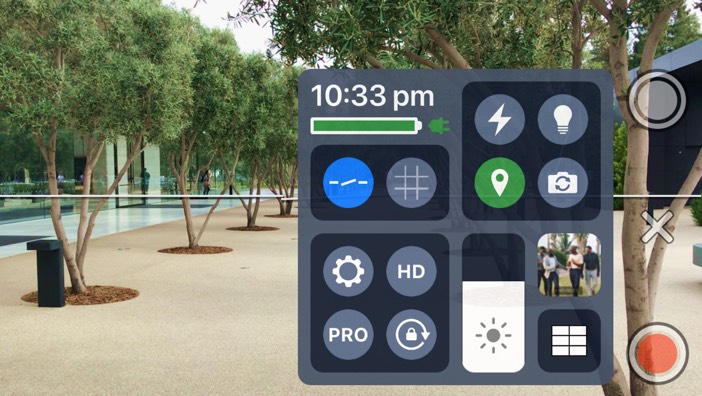
Viewfinder Options
The viewfinder options display the current time-of-day, battery and charging indicators.
Underneath, you can switch between no leveler, leveler, combo leveler / horizon tools. You can alternatively choose a "thirds" overlay, commonly used for visual interest - try placing something behind one of the lines as opposed to exactly in the center.
You can toggle flash for photos on/off, as well as turn the always-on lamp on/off for video recordings.
The pin icon allows you to turn location tagging on/off for subsequently recorded videos or photos. A green pin means the device currently knows its location. Red means the Buttery app does not have permission from you to access your location (go to the iOS Settings app under Buttery to change). Orange means the app has permission, but isn't currently sure where it is (it will keep trying to figure it out).
You can switch between front and rear-facing cameras on your device.
There's a slider to control screen brightness and lock/unlock device rotation changes without leaving the app.
You can turn "Pro" mode on/off. Pro mode locks the camera exposure, focus and color temperature settings and allows you to change them manually.
You can also go to the Settings menu (gear icon), the Gallery (the 6-item grid icon), the last recorded video or photo (shown at small size), or change the video quality and frame rate.
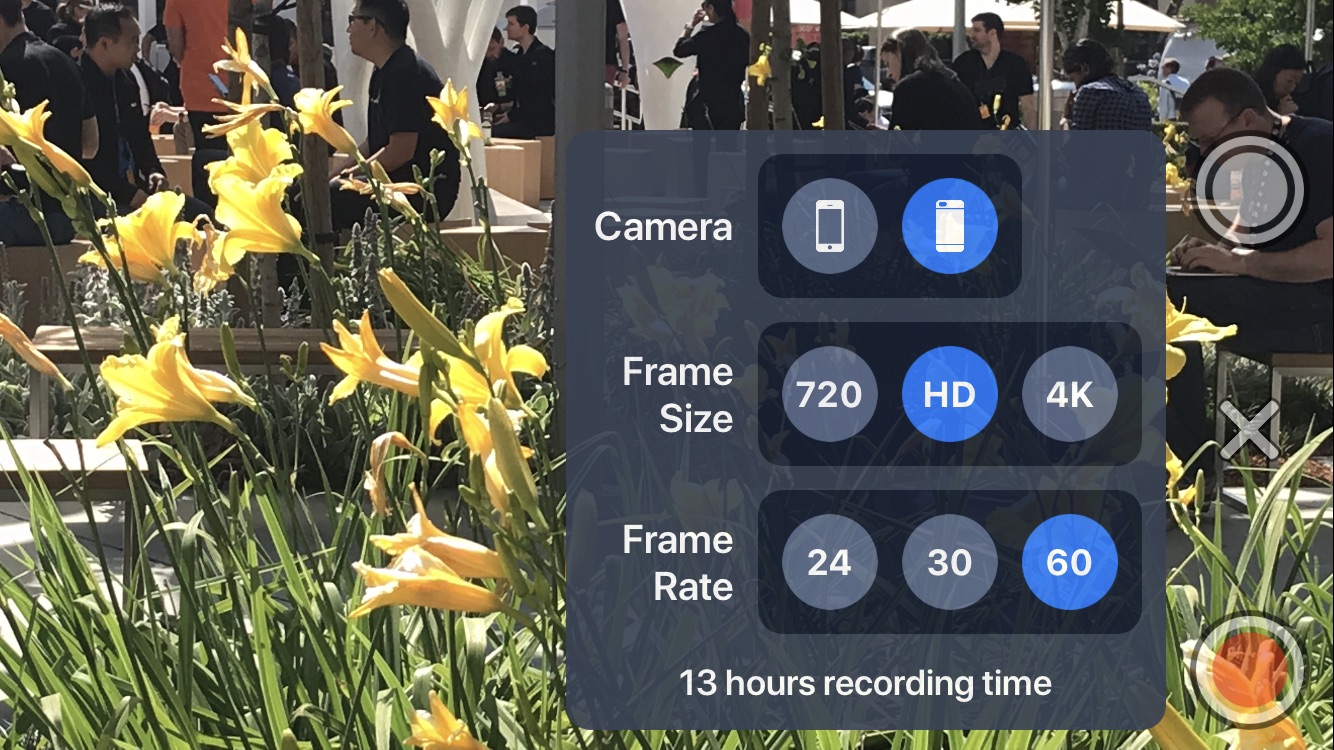
Video quality
In the Camera row, you select which camera you want to use - the front (facing you when you look at the screen), the back camera, and on dual-camera devices the telescope camera (for focusing at objects further away).
Once you select the Camera row, the video frame sizes (or resolutions) supported by that camera are shown. Depending on your device, you can choose:
"720" (lower-quality HD, stands for 720p, dimensions are 1280 wide by 720 tall)
"HD" (High Definition, 1080p, dimensions are 1920 wide by 1080 tall)
"4K" (Also called Ultra HD, dimensions are 3840 wide by 2160 tall)
For most purposes (such as playing videos on your iPhone, iPad, or HD television), the "HD" setting works great.
If you are going to play the video on a 4K television, select "4K" if available. But 4K also takes up far more space on your device than HD, so only use it if needed.
For any video quality setting (2nd and 3rd rows), the approximate available recording time on your device is shown.
Settings
In the "Display" section, you can turn the Zoom, Audio Meter, Auto-Dim and Pro Exposure in the viewfinder on/off.
In the "Camera" section, you can freeze the current camera settings including exposure (ISO and shutter duration), color temperature and focus. This freezes applies in both normal and PRO modes. It allows you to record one or more videos without the automatic systems changing any of these items (which can look weird in the resulting video).
The "Anti-Shake" motion stabilization can be turned on or off. Note that even on the iPhone X, the Buttery stabilization mode does not introduce frame "stuttering" while moving the camera.
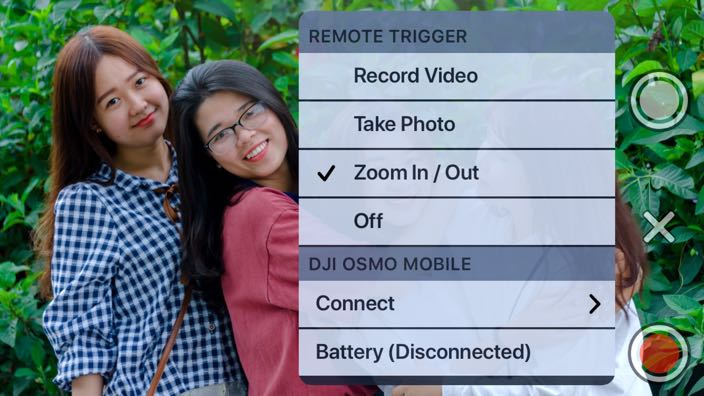
If you have a physical Bluetooth trigger device (less than $10 on Amazon), you can easily avoid bumps caused by tapping the screen, and control the camera from a distance. In Settings, choose to start / stop recording, zoom in / out, or take a photo without touching your device.
Note that many selfie sticks already have the Bluetooth trigger built-in as well.
If you have a DJI Omso Mobile gimbal, Connect it in Settings to view its battery level, status and use the physical record start/stop and take photo buttons.
There's also a quick reference guide, a place to let us know your thoughts on the camera app, and a way to tell friends about it. Finally, there's some info on our other apps if you're so inclined (they're Simple Fun).
Playback Screen
The playback screen allows you to playback videos (tap the Play button), view stills, view animating GIF images, and tap-to-animate Live Photos.
The magnifying glass button turns the zoom slider on/off. Once you've zoomed in at all with the slider, you can swipe to choose which part of the zoomed image is showing.
Nearby, the two-arrow icon turns the scrub slider on/off. Scrubbing refers to quickly moving through the entire video, normally to find a particular section you're interested in viewing.
During playback, the elapsed time is shown. To the left and right of the elapsed time are controls to go forward and backwards one frame at a time.
You can swipe left or right to see the previous or next item, displayed in the order they were recorded.
The camera icon returns to the live viewfinder.
The "+" plus button opens playback options.
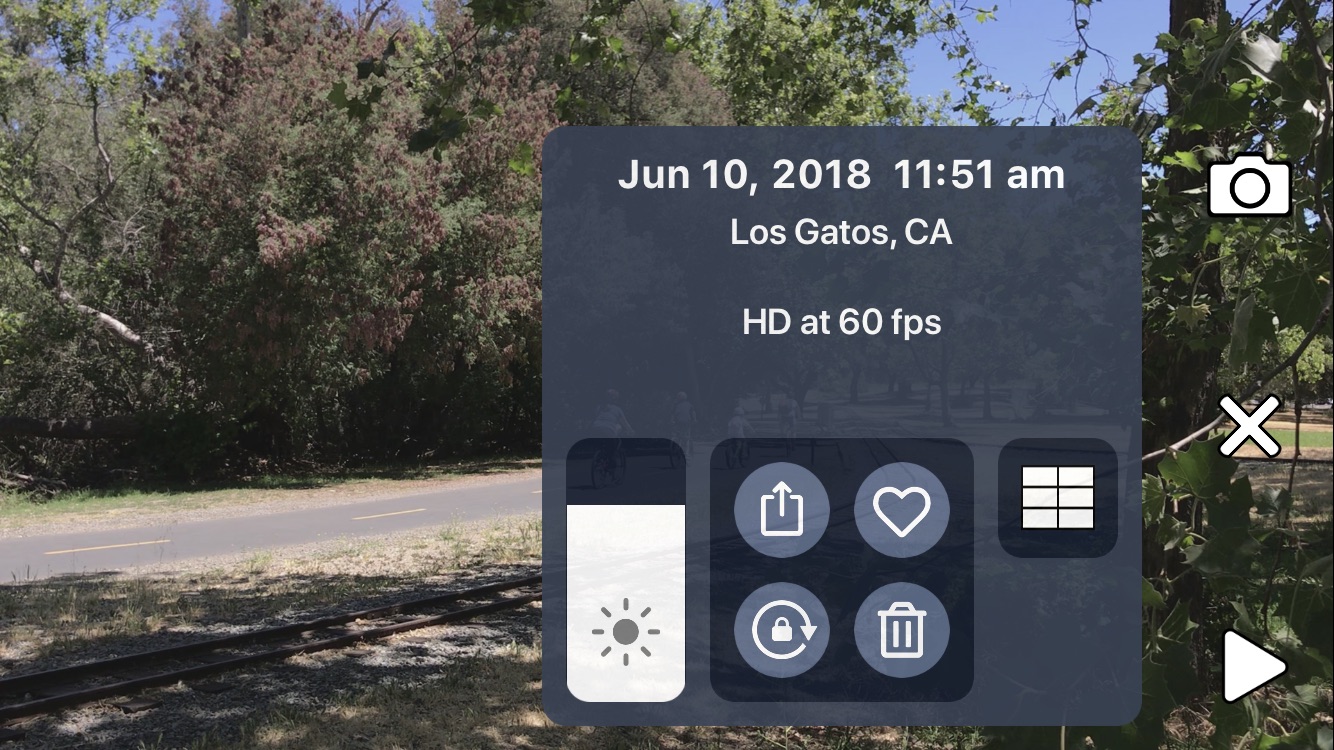
Playback Options
You'll see the date and time the recording was created. If Location Tagging was enabled and available during recording, you'll see the city and state as well. For video clips, you'll see the video quality.
The same screen brightness and orientation lock controls available in the Viewfinder Options are also found here.
You can select your "favorite" recordings - this the same setting used in the iOS Photos app - you'll see the same recordings with the same favorite choice in both places.
You can delete recordings. There's an additional alert to make sure you don't accidentially delete recordings, as there's no way to recover them once deleted.
The 6-grid icon takes you to the Gallery.
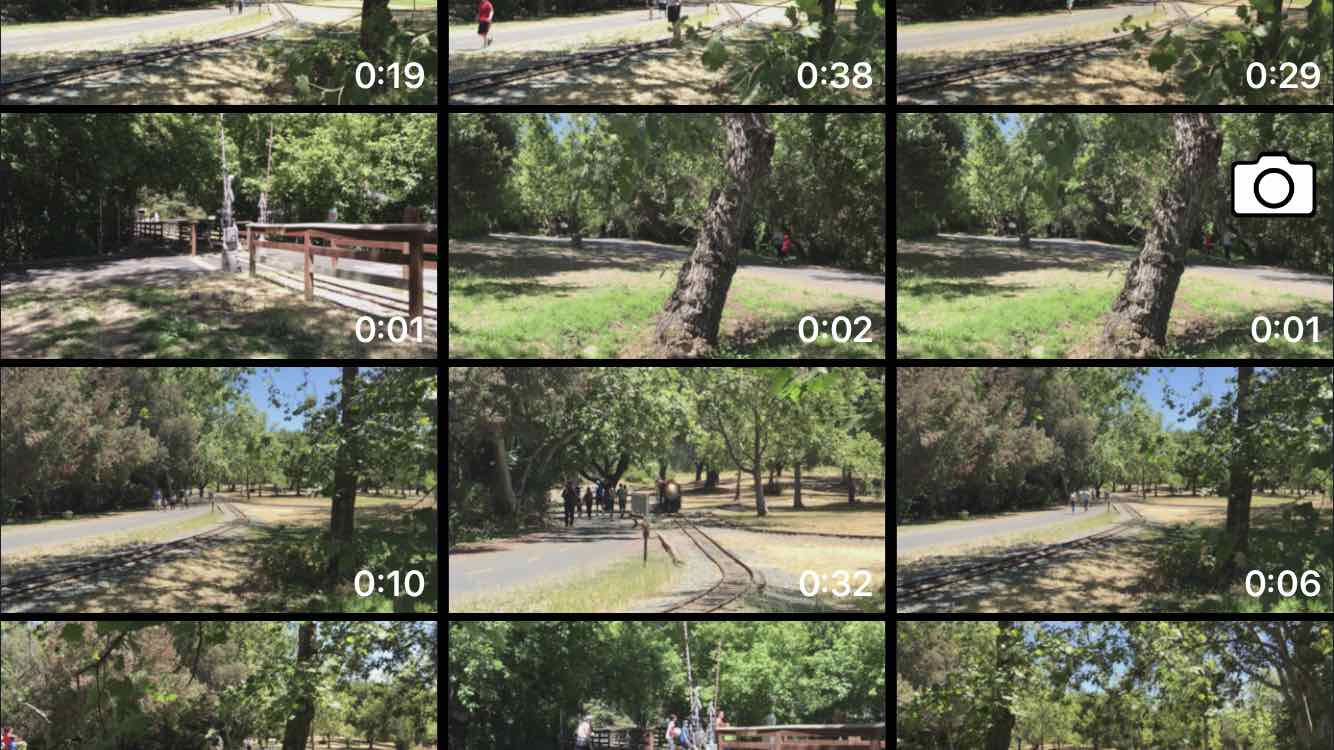
Gallery
The gallery displays all of your videos, photos, Live Photos and animated GIF images, sorted by their creation date. The most recent items are at the top.
Videos are shown with their duration.
Tapping on any item brings that item to the Playback screen.
The gallery either shows landscape (wide, same as televisions) previews, or portrait (tall) images, depending on the current orientation of your device.
The camera icon returns to the live viewfinder.